You may be asking yourself why anybody would want to run three different operating systems on one computer. The most obvious answer would be, “because you can!”
Video Playlist
The entire build process was, in addition to this written post, documented in the form of videos, which you can find below. Some of the videos include individual unboxings & overviews of each of the components, a shortened build guide, OS installations and more.
Thanks to the sponsors…
Without the help of the following sponsors, this build wouldn’t have been as cool or fun.
VisionTek initially provided one of their power supplies as a sponsored component, but the result was a small plume of smoke coming from the back of the power supply. Clearly, this wasn’t a good thing, so it was best for them to back out.
In addition to this being more of a “because you can” type of build, there actually are people who like using all three operating systems from the same computer. Doing so offers the best of all three software worlds, allowing people to explore and be more open to the software around them. Said operating systems, at least for this particular build, include Windows 10 (Technical Preview) 64-bit, Ubuntu 14.10 (64-bit) in addition to Mac OS X Yosemite (10.10.3).
This build aims to provide a 100% working environment that all three operating systems can function properly in, all with rather impressive performance and general usability.
This goes without saying, but using the term “ultimate” to describe something is very subjective. Is this the “ultimate” $500 triple-boot PC build? Probably not, as even I would’ve made some hardware changes, but the build itself is without a doubt a fine one for the money.
Components
The total cost for this build, after factoring in mail-in rebates, is around $500. This includes all of the 8 components, which were brand new, and are detailed a bit more below. Could you have doAside from the case, RAM and SSD (which were sponsored), the CPU, motherboard, video card and hard drive were purchased from SuperBiiz. The power supply, however, was purchased locally from a TigerDirect store. The components below link to Newegg, Amazon, SuperBiiz and TigerDirect where applicable.
Note: The prices mentioned below are as of 5/6/2015 and are subject to fluctuation.
Case – Antec VSK-3000
Price: $29.99 – Newegg, $27.51 – Amazon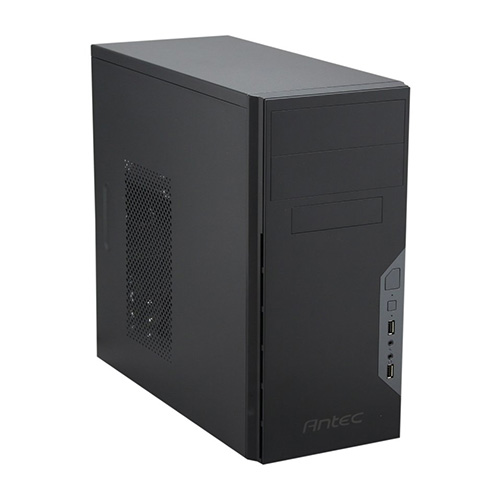
First up is the case, which was generously supplied by Antec for this build. The case has excellent reviews, doesn’t cost an arm and a leg, has plenty of room on the inside for the parts (and cabling) and it doesn’t look half bad. I only really wish that it had front USB 3.0 ports (they’re only USB 2.0), but that’s certainly something that you shouldn’t avoid this case for (unless front USB 3.0 ports are a must for what you’re wanting to do).
RAM – Apotop 8GB (2x4GB) DDR3 1600 RAM Kit (U3A4Gx2-16CBWB)
Price: $62.99 – Newegg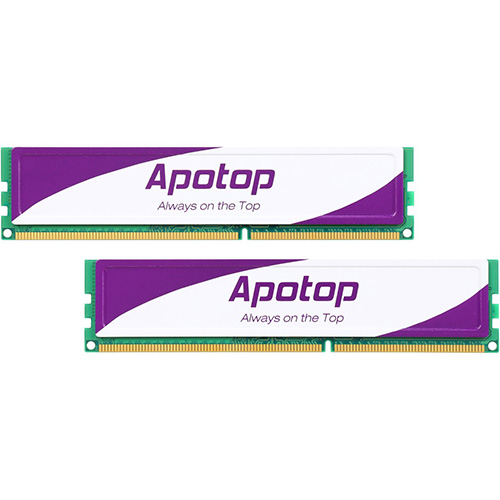
Another sponsored component was the memory kit, provided by Apotop. While this memory kit isn’t the most affordable option around, it gets the job done perfectly fine. It features a white and purple Apotop-branded heatspreader (to help with heat dissipation) while the actual stick/DIMM uses a green PCB. I prefer RAM that’s black, but this will fit the build just fine as the case doesn’t feature a side panel to see through to the inside anyway.
SSD – Patriot Blaze 120GB (PB120GS25SSDR)
Price: $57.99 – Newegg, $58.84 – Amazon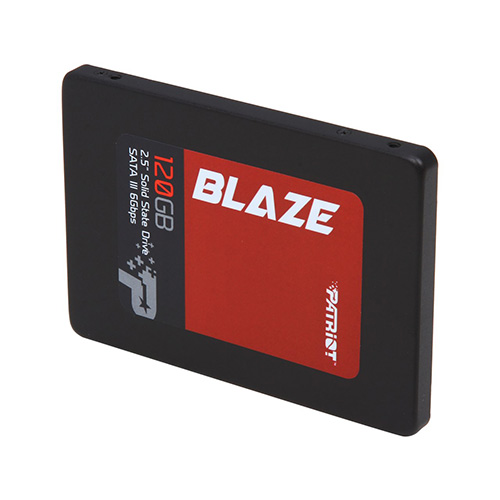
The last sponsored component was the SSD, courtesy of Patriot Memory. I wanted to make sure that this build had a solid-state drive, as it makes dealing with software an order of magnitude faster than that of a mechanical hard drive. While I was actually sent a 240GB unit, the 120GB model would’ve fit the bill fine.
Motherboard – MSI H81M-P33
Price: $41.99 – Newegg, $52.96 – Amazon, $43.99 – SuperBiiz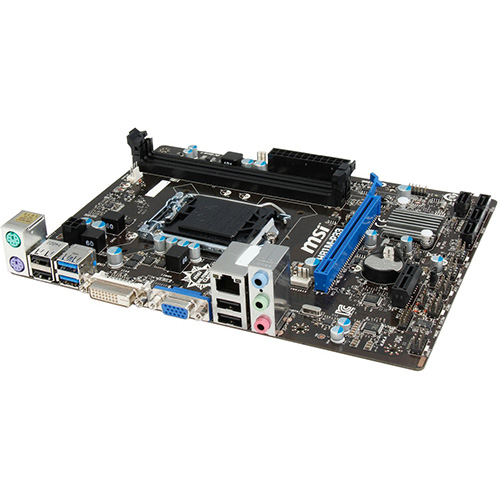
When working with a hackintosh, the motherboard is one of the more crucial components. (Spoiler alert!) Fortunately, the H81M-P33 by MSI works completely fine with Mac OS X. It may not look like much, but it has everything I was looking for, including a few USB 3.0 ports (for installing the operating systems from a fast USB 3.0 flash drive) and a few SATA III 6Gbps ports (for our drives).
Video Card – MSI GeForce GT 740 (N740-1GB5)
Price: $74.99 – Newegg, $84.99 – Amazon, $69.99 – SuperBiiz
While this little video card certainly isn’t going to handle 4K games at 60FPS, it will handle light gaming perfectly fine. It’s also completely compatible with all three operating systems, which is a massive plus. I was slightly hesitant when selecting this video card, as it’s been said it can have reliability issues, but it’s been working completely fine for me thus far.
Power Supply – Ultra 550W (ULT-LSP550)
Price: $35 – TigerDirect (Estimate)
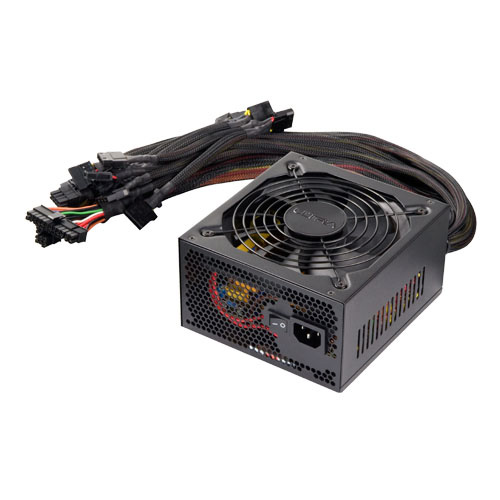 After having the unfortunate experienced with the previously-sponsored VisonTek PSU (as mentioned earlier), I went out to my local TigerDirect store and picked this up. It’s just an above-standard PSU that pumps out 550 watts of power. It’s not a modular PSU, so all of the cables coming out of it can’t be detached. Still, this PSU provides more than enough power for everything it’ll be turning on, but is capable of powering more powerful components should they be added or replaced later on.
CPU – Intel Core i3-4330
Price: $134.99 – Newegg, $134.99 – Amazon, $129.99 – SuperBiiz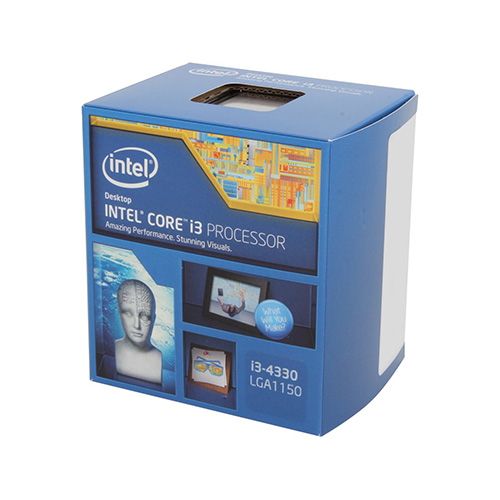
The most expensive component for this build was the CPU. This little dual-core chip is very speedy and offers perfect compatibility across the board. As long as you’re not trying to do intense video editing or anything too intense, this CPU should be able to handle it all with ease. It also comes with a heatsink/fan combo unit, which keeps the CPU within reasonable temperatures, even for long periods of use.
HDD – Seagate Barracuda 1TB (ST1000DM003)
Price: $51.99 – Newegg, $50.97 – Amazon, $48.99 – SuperBiiz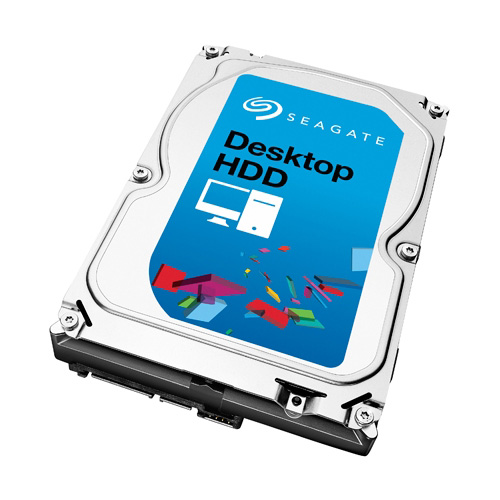
Lastly, we have our hard drive. For this particular build, the drive actually wasn’t used for storing any data. It’s just there to allow those who may do this build for themselves a place to store the rest of their data. In this case, the SSD is used solely for operating system files and other programs. I’ve been using Seagate drives for years and have yet to have an issue with them. More specifically, I’ve used this model in a handful of other builds and have generally been pleased with its price and performance (though single hard drives can only perform so fast).
The Build Itself
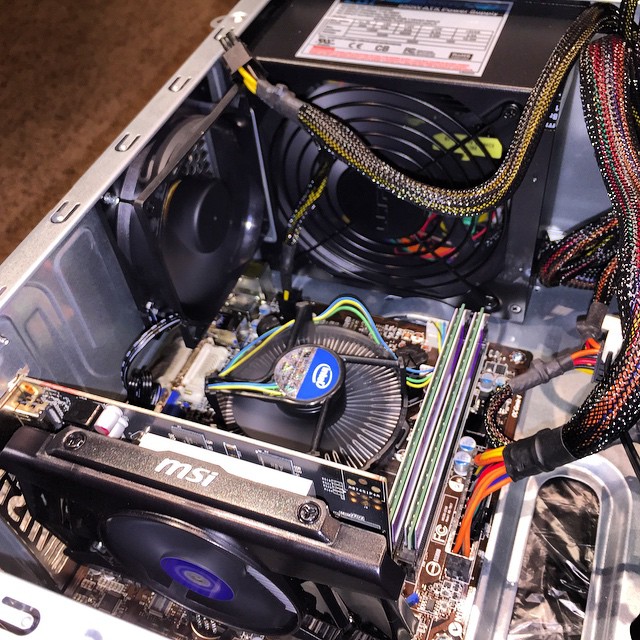 As far as a PC build went, this one was pretty straightforward. I won’t be writing out the build process here, but the video above does show this in a bit more detail. Essentially, you put the thing into the thing, put the other thing into the other thing, repeating the process several times until everything is put together. Voila! You have a PC.
But the luck would’ve been too good for things to go without problems.
As mentioned a few times already, there was an issue with the initial power supply. After pressing the case’s power button, the PSU started smoking out the back. The computer itself didn’t actually power on. I immediately unplugged the PSU and sent it back to the sponsor. Ditching the problem PSU with a different model made things turn on perfectly.
The other only issue was with the SSD. The first unit that Patriot sent would only be detected by the motherboard if it was plugged in after the computer was powered on already. The SSDs that I used in my personal build worked with this new computer just fine, which led me to think that the SSD was at fault. Patriot generously agreed to send a replacement unit (which did come in retail packaging that looked a bit different), which worked completely fine, as it should’ve from the beginning.
Cable management is always a worry of mine, even if you’re using a computer case that doesn’t let you see inside. It would always bother me knowing that things are messy within. Poor cable management could also negatively impact airflow and temperatures. Still, even with a non-modular power supply, managing the excess cables within the case was actually pretty good. I didn’t have to shove any of the cables between the case’s motherboard mounting plate and the other side panel. I was able to just bundle the leftover cables together and hide those where your optical drives would go (as none were used for this build).
Aside from the above issues and concerns, everything else went together without a hitch. Thanks to the mostly-compact case, everything can be transported with ease. It’s just a nice, satisfying build all around.
Installing Windows, Linux and Mac OS X
The “Clover” bootloader, after everything is done being configured…
Running multiple operating systems on the same computer isn’t that difficult, but having all of them run off of the same drive could cause some issues. Fortunately, it’s possible.
The following isn’t exactly for newbies, so if you’re having any trouble, referring to the videos in the playlist above should help.
The Windows installation is mostly straightforward, though there are a few additional steps at the start that need to be done. First, you have to obtain the copy of Windows, which again will be the Windows 10 technical preview. Anybody can download it for free from Microsoft. After the 64-bit ISO file is downloaded, use the Windows 7 USB/DVD Download Tool to make a bootable USB drive from it. Once that’s finished, you can boot from the flash drive.
When you’re at the first Windows installation screen, press Shift+F10 to bring up the Command Prompt. Here, we’ll be manually making an EFI partition (which is where the bootloaders will be stored) with the proper size that Mac OS X is friendly with. Here are the commands:
- diskpart
- list disk
- select disk # (replace # with the drive number of your drive you want to use)
- clean (makes the drive as if it came out of the factory)
- convert gpt
- create partition efi size=250
- format quick fs=fat32 label=”EFI”
- create partition msr size=128
- exit
- exit
You can now go through the next couple of screens from within the Windows installer. When it asks about partitions, you can use this time to create the partitions for all three operating systems. I made the Linux (2nd data partition) partition 15GB while the Mac OS X one was 60GB. The rest of the unallocated space went towards the Windows install.
You can now proceed with the rest of the Windows installation. Drivers can be download from MSI’s support page for the H81M-P33 motherboard. Even though we’re using Windows 10, all of the download links for Windows 8.1 64-bit will work.
Now that Windows is done, we’ll do Ubuntu 14.10 next. It can be downloaded from Ubuntu’s download page. To prepare the Linux flash drive, I used the Universal USB Installer, which you can download here. Everything else there is pretty straightforward.
After booting the USB drive, go through the screens until you get to the part where it asks if you want to use the normal install process, or “something else.” Choose “something else,” and click on the partition that you made for Linux. We’ll format the partition to the proper Linux filesystem, which is ext4. To do this, click on the change button, which is next to the + and – buttons. Select ext4 as the filesystem, check the box, and select / as the mount point. For the bootloader path, select your Linux partition. You can now proceed with the rest of the installation process.
As far as I know, Ubuntu properly detected every piece of hardware from this build, so there was no need to hunt for anything else to get it working properly. Our time to setup Linux is now complete.
Now, the fun part, which is installing Mac OS X. For setting up our USB installation drive, I followed this guide on tonymacx86, which tells us how to install Mac OS X using the Clover bootloader. Keep in mind that we’re running an EFI installation of Yosemite, and not a regular MBR one. You can follow all of the steps in that guide, but stop when you get to step 4. It’s important that you skip parts 1 through 3. Just follow 4 through 9. At this point, Mac OS X should be installed. A few final steps include installing a few extra drivers. This is done via MultiBeast from tonymacx86. Below is a screenshot of what you have to check. Afterwards, everything for Mac OS X is done. The only catch is that sleep/standby doesn’t work like you’d expect. The OS will still turn off, but the majority of the computer remains powered on.

The options to select in MultiBeast…
Currently, the only way to boot Mac OS X is if you use the bootloader on the USB flash drive. This is because the motherboard isn’t seeing the copy of the Clover bootloader that was already installed to the SSD. You can boot Windows and Ubuntu just fine, though. To fix this, we’ll use a free tool for Windows called EasyUEFI. This will let us manually add a new UEFI boot entry. When making a new entry, make sure you select the Linux or other OS bubble. The path for our EFI file is: /EFI/Clover/CLOVERX64.EFI. The Clover bootloader is now available in our boot selection F11 menu.
At this point, the OS installation is now completely finished. You can boot between Windows, Ubuntu and Mac OS X, all from within the Clover bootloader, and all from a single drive.
Performance
Performance has been quite impressive. Boot times for all three operating systems are well under 30 seconds a piece, and application launch very quickly. Much of this is thanks to OS optimizations in addition to the fact that we’re using an SSD as our boot and software drive.
I did a basic ATTO disk benchmark for the SSD, which tests for raw transfer speeds at various file sizes. The max speeds that I saw exceeded 500MB/s for both the read and writes. This is about average for today’s consumer 2.5-inch SSDs.
As far as games go, the GeForce GT 740 did exceptionally well — much better than I thought, actually. Here’s a list of everything graphically that I tested:
- Unigine Tropics Benchmark – Good @ max
- Unigine Sanctuary Benchmark – Good @ max
- Unigine Valley Benchmark – Good @ low
- Unigine Heaven Benchmark – Good @ lower
- Call of Duty: Black Ops II (Multiplayer) – Good @ max
- Counter-Strike: Global Offensive – Good @ max
- FlatOut 2 – Good @ max
- FlatOut – Good @ max
- MTA: San Andreas 1.4 – Good @ max
- Grand Theft Auto V – Good @ low
- Just Cause 2 – Good @ medium
- Portal 2 – Good @ max
- Project CARS – Good @ low
- Test Drive Unlimited 2 – Good @ max
- The Crew – Good @ low
- Test Drive Unlimited – Good @ max
As you can see, the list above is a good mix of new, old and in-between. All were tested at 1920×1080 resolution with a mix of graphics settings, as noted for each. For the games that performed the best when on medium or low settings, the quality of the graphics were actually quite good, enough to make this a pretty good entry-level gaming PC. So, if you’re not very demanding when it comes to eyecandy, the GeForce GT 740 can actually fair very well. I was most impressed by the performance of GTA V, even at low settings. The frame rate was anywhere between 40 and 60FPS, and it doesn’t look half bad.
Conclusion
Given the hardware and the price of everything, I was very happy with this build. It can not only run any operating system without a problem, but it can also game pretty nicely. If you’re looking to build a nice, somewhat-compact system for a reasonable budget, this one (or a variation of it) would be worthwhile.
Feel free to follow Brian and Gadget Unit on Twitter.