There’s no denying the fact that Apple computers are expensive. You may have heard of the term “hackintoshing” in the past. If you’ve ever been interested in giving it a try, the time has never been better. If you’re interested in building your own 100%-compatible hackintosh, priced at just $450. This will save you a large amount of money, and you’ll be getting something that performs on-par, or better, than a comparable Mac mini, which would be priced near $1,000 if configured with similar parts by Apple. As an added bonus, this machine will be a dual-booting one, meaning you can easily switch between Windows 8 as well as Mac OS X 10.8.2.
Videos
I’ve created many videos to help document everything about this build, including an overview, unboxings & overviews of each of the parts, as well as the installation processes for both Windows 8 (EFI) as well as Mac OS 10.8.2. You’ll find the YouTube playlist right here:
Sponsors
This build wouldn’t be possible if it weren’t for the generous folks over at APEX and Seagate for their very generous donation of a few key components for this particular build. APEX supplied their MI-008 mini-ITX computer case, while Seagate provided their Momentus XT 750GB hybrid hard disk drive. If you’re willing to piece together this build yourself, I highly recommend giving their parts a try for a fail-proof build.
Background
I love building computers, and it’s been nearly two years since I built my last one. A number of components for this build were on sale recently, so I decided to give another one a go, one that’s budget-oriented, but is still very fast for day-to-day computing. This one fits the bill perfectly.
There were some goals that I set for this particular build:
- It had to be cheap
- It had to run Windows 8 (EFI) as well as Mac OS X (10.8.2) without a problem
- It had to be small/portable
- It had to be fast and power-efficient
This build, which will run you around $450, achieves all of those quite well.
Notice how it says that we’ll be doing an EFI installation of Windows 8. That’s because I did. This offers a number of advantages, most notable is its massive improvement in boot times over your typical MBR installation.
Full System Specs
For your spec lovers out there, here is everything that this build has:
- Intel Core i3-3225 @ 3.3GHz CPU
- Intel HD 4000 iGPU
- 8GB (2x4GB) DDR3 1600MHz PC3-12800 RAM
- GIGABYTE GA-H77N-WIFI motherboard
- Intel Centrino mini-PC Wi-Fi and Bluetooth 4.0
- Windows 8 Professional 64-bit with Media Center
- Mac OS 10.8.2 “Mountain Lion”
- 250-watt power supply
- Seagate Momentus XT 750GB HHDD
Required Parts
Seeing as this is a mini-ITX build, meaning that it will be using the very small mini-ITX motherboard standard, you won’t be needed too many components, at least for the bare minimum of things that you might want to get done.
Without further ado, here’s the parts list, which consists of just 5 parts. Each part contains a link to its page on NCIX’s US website, which had the best prices for all five parts that I could find, at least at the time:
- (HDD) Seagate Momentus XT 750GB ST750LX003 ($120.35)
- (CASE) APEX MI-008 ($49.99)
- (CPU) Intel Core i3-3225 ($129.99)
- (MOBO) GIGABYTE GA-H77N-WIFI ($103.26)
- (RAM) Patriot Viper 8GB PV38G160C9K ($37.99)
Hard Drive
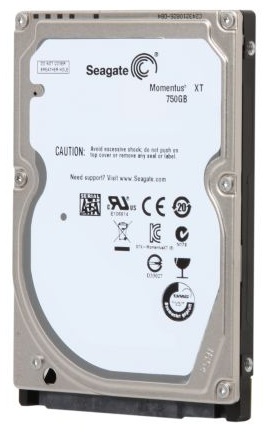
This is not your traditional mechanical, rotating hard drive. Instead, Seagate’s Momentus XT 750GB 2.5-inch drive contains 8GB of flash storage, which is automatically used as a cache drive. What this means is that all of your most commonly used data is kept onto the flash memory, allowing for much faster boot times, application launch times, and more. Raw file transfer speeds will remain average, though. Fortunately, the performance improvements are quite real.
Case + PSU
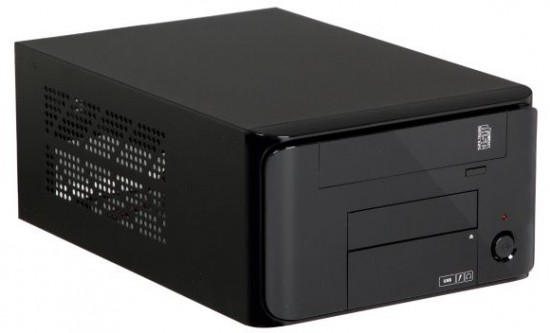
As noted above, I wanted for this build to be small, and it really is. It’s not an insanely small NUC sort of thing, but it’s still very portable and can easily be used as an entertainment PC. I’m very happy with how the APEX MI-008 turned out. Even better is the fact that you have a generous 250-watt power supply integrated right into the case, which is plenty of power for everything else that will be going inside of it.
CPU

Intel is the leader when it comes to general performance, especially with their third-generation “Ivy Bridge” processors. They aren’t as fast when it comes to onboard graphics, which is where AMD completely trumps Intel, but general performance is very good, even with the Core i3-3225.
Motherboard
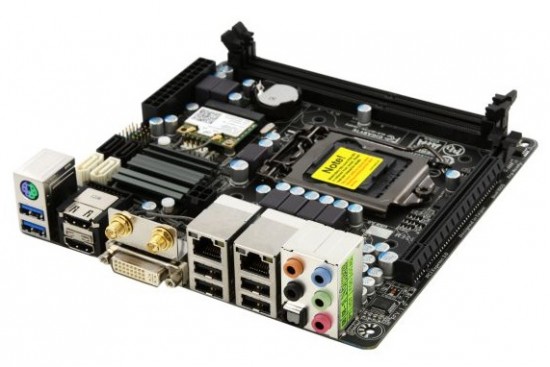
Now, we need something that can help control all aspects of the machine, hence the motherboard. GIGABYTE’s GA-H77N-WIFI is perhaps the best mini-ITX motherboard, featuring lots of little things that competing boards don’t offer, such as integrated Wi-Fi and Bluetooth 4.0, dual gigabit Ethernet ports, and dual HDMI outputs. There are a lot of cutting-edge features packed onto this little board, and it works great when put together.
RAM
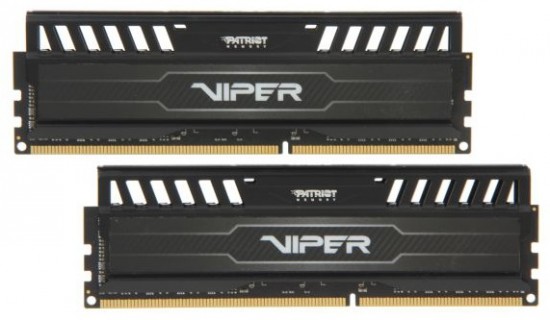
Lastly, we have our RAM, or “memory.” This is Patriot’s “Viper” 2x4GB desktop kit (DDR3, 1600MHz, PC3-128000), giving you 8GB of memory, which is more than enough to keep this machine running stable with many applications open at once. It also looks very slick, thanks to their matching black PCB and heatspreader. One annoyance of mine is that many memory modules have, for example, a green PCB with a completely different colored heatspreader. While this doesn’t matter at all once everything is put together, it’s just annoying to know that the two components don’t match.
Optional Parts
You may have noticed that this build doesn’t feature an optical drive. That’s because, for operating system installation, a simple USB flash drive is used.
Here are some of the optional parts that you can purchased for around $80 more (again, prices are at the time of purchase, which may be different now):
- (ODD) LITE-ON iHAS124 SATA DVD drive ($16.98)
- (CARD) Generic USB 3.0 front 3.5-inch card reader ($19.99)
- (WI-FI) TP-LINK TL-WDN4800 PCI-E Wi-Fi Adapter (OSx86-compatible) ($39.27)
All three parts offer perfect, out-of-the-box compatibility with any desktop operating system that you throw at it, including Mac OS X. That Wi-Fi card in particular is very recommended amongst the OSx86 community, as it adds you native Wi-Fi without having to do any tweaking whatsoever.
The Build
Because the amount of space that we have to work with is rather small, this may be more time consuming, especially to newbies.
To start, you’ll want to prepare your motherboard by installing the two RAM DIMMs, the CPU, and its included heatsink+fan combo. Afterwards, you can install the motherboard into the case with just four screws, but not after you install the IO shield into the back of the case, also not after you make sure that you remove the power supply, which will give you much more room to work with.
Once the motherboard is mounted, you’ll need to find a place to mount the 2.5-inch hard drive. This case is suited for a standard 3.5-inch desktop hard drive, but you can still mount it practically anywhere that you have room, perhaps with some velcro. I used a single screw to mount it where a standard 3.5-inch drive would’ve gone, which is on a rail to the right of the motherboard, as shown in the build video above (part 7).
Now, you can begin to connect the various power cables, front panel cables, and hard drive SATA cable into their respective ports. Refer to part 7 above if you’re having trouble.
The build is practically completed. After doing a little bit of cable management, you can reinstall the power supply, and slide the top case cover back into place, securing it with the four screws.
Windows 8 [U]EFI Installation
Starting in the 64-bit version of Windows Vista, Microsoft added EFI support. While most of the features don’t apply to consumers, one thing that you will have is a big boot speed boost, due to less things needing to be initialized during the boot process.
The installation process is literally exactly the same as with a standard Windows installation. Simply boot into the EFI version of the installer, as you’ll see from your BIOS’s boot selection screen, go through the usual installation steps, and within 15 minutes or so, you’ll be at your Windows 8 desktop (or the Metro/Modern UI, rather, which Start8 solves).
Now begins the process of installing the appropriate drivers to make sure that the software (Windows) properly interacts with your hardware. Unless you included an optical drive in the build, the two driver DVDs that came with the motherboard are pretty useless. Fortunately, all motherboard manufacturers include the drivers for download on their website. For this particular motherboard, you’ll find all of the downloads for it here. For the Intel HD 4000 CPU in particular, you’ll find the latest drivers here.
Mac OS X Compatibility
All told, this machine, mainly thanks to its motherboard, makes for a great hackintosh. Everything, other than the integrated Wi-Fi card, works. As noted above, a different Wi-Fi card could be had to make native Airport/Wi-Fi working. Bluetooth? Check. Sleep? Check. Graphics acceleration from the HD 4000? Check. Audio? Check. HDMI output with audio? Check.
Mac OS X “Mountain Lion” Installation
Hackintoshing is a bit more tricky, but with the latest efforts by the likes of tonymacx86 to make retail installations simple, it really is simple.
Before the installation actually begins, the hard drive will need to be shrunk, so that a new, dedicated Mac OS X partition can be made. This was done, very quickly, within Windows’ Disk Management program.
To start, you’ll need a copy of Mac OS X 10.8, purchased from the Mac App Store. So, yes, you’ll need an existing machine that runs Mac OS X to prepare your USB flash drive, but a Mac OS X virtual machine inside of VMware Workstation for Windows will work just fine. To prepare my USB drive, I needed UniBeast for Mac OS X. Because I was using a pure .DMG of 10.8.0, I had to make some modifications to UniBeast, as outlined here.
Once the USB drive was made, I actually booted the computer from it. At the Chimera bootloader, I simple booted with -v (verbose mode) so that I can see the boot process in the form of lines of text, to see if anything goes wrong. Once at the installer, the partition that we created in Windows needs to be formatted to the HFS+ filesystem, aka Mac OS Journaled (Extended) from with Utilities > Disk Utility. Afterwards, the installation process can begin.
Mac OS 10.8.0 is now installed, but there’s no bootloader installed onto the hard drive just yet, so we have to use the Chimera bootloader that’s on the USB drive. Instead of booting from the actual installer like before, we’ll have to boot from the actual partition that we made earlier. The first boot takes a while, but that’s fixed later once all of the proper drivers, tweaks, and updates are installed.
Once at the desktop, the 10.8.2 combo update needs to be installed. At the end, the Installer will ask for a restart, but we can’t do that just yet. Instead, we have to run MultiBeast, selecting Drivers & Bootloaders > Drivers > Audio > Realtek ALC8xx > With DSDT > ALC892. The DSDT for this board can be found here, and need to be renamed to “DSDT.aml” on your desktop before MultiBeast does its thing. Also, check “UserDSDT or DSDT-Free Installation” and the Chimera bootloader under Drivers & Bootloaders > Bootloaders. Click on Continue, and then Install. The first few boot processes will be slow, but after that, it’ll actually be quite quick.
Switching between Windows and OS X
Because we aren’t using a traditional MBR-formatted drive, we can’t use a single bootloader to switch between the two operating systems. Instead, you’ll have to rely on using the BIOS’s boot selection screen (F12 on your keyboard after pushing the power button). Choose Windows Boot Manager for Windows, and the name of the hard drive for Mac OS X. Yes, you’ll see Windows as a boot option from within the Chimera bootloader, but it simply won’t work. Also, if you get a boot0: error error when choosing just the hard drive, follow the fix here.
All done!
So, how about that? For around $450, you can build yourself a PC that’s fast, small, and affordable. The best part? It runs two great operating systems, perfectly at that. Oh, and unlike Apple computers, you can upgrade just about everything about it later down the line if you’d like.
Planning on doing this same exact build yourself, or do you have some general questions/comments? Feel free to leave those down below. Also, feel free to follow Brian and Gadget Unit on Twitter.